


Why you should use a professional photographer
Bad photos can totally destroy the best-designed website, so it is a good investment to use a good professional photographer!
They should have the right equipment and know about set design, resolution, sizes, lighting, and what should and should not be in a photo, as well as carrying out all the necessary editing for you.
If there is any doubt, we are happy to discuss this matter with your chosen photographer.
Why photo size is so important
Modern cameras take absolutely massive photos, both in size (pixels) and weight (MB).
Uploading large photos for a website will impact the page opening speed, which is undesirable, and slow loading pages is one of the best ways to lose your audience as well as cause issues with search engines when they crawl your website!
We will always ensure all of your images are optimised for web use before final publication.
Photo & logo formats
Popular image formats for web use
- JPEG & JPG: Joint Photographic Experts Group.
Use: web photos - SVG: Scalable Vector Graphics.
Use: logos and illustrations. - PNG: Portable Network Graphics.
Use: logos & illustrations; they should not be used for photos. - GIF: Graphics Interchange Format.
Use: Animations.
Product photos are best on a plain background, preferably white if possible, which we can remove and replace in most cases with a gradient if required. This will help to highlight the product.
Logos are best in SVG, as it is a scalable format. Making them with transparent backgrounds will reduce the file size. They should be exported correctly from a suitable graphics program. SVG converters should not be used as they do not produce the required result.
If you can't supply us with SVG images, the next best is PNG with transparent backgrounds.
SVG vs. PNG
Many people will pan and zoom their phones and other touch-screen devices.
Images in PNG format, if made too small, will pixelate, making them look blurry.
SVG images scale up perfectly with no pixelization.
The larger images below had had their original width stretched to simulate zooming on a touch-screen device.
PNG: Width set at 250 pixels
This is the original size the graphic was made.
No pixelisation.

PNG: Below is the same image as above but with the width stretched to 700 pixels using CSS code
Pixelisation occurs, rendering the image blurry.
If you are viewing this on a small device such as a phone, zoom in with your fingers to see the result.
SVG: Width set at 250 pixels
This is the original size the graphic was made.
No pixelisation.

SVG: Below is the same image as above but with the width stretched to 700 pixels using CSS code
No pixelisation.
If you are viewing this on a small device such as a phone, please zoom in with your fingers to see the result.
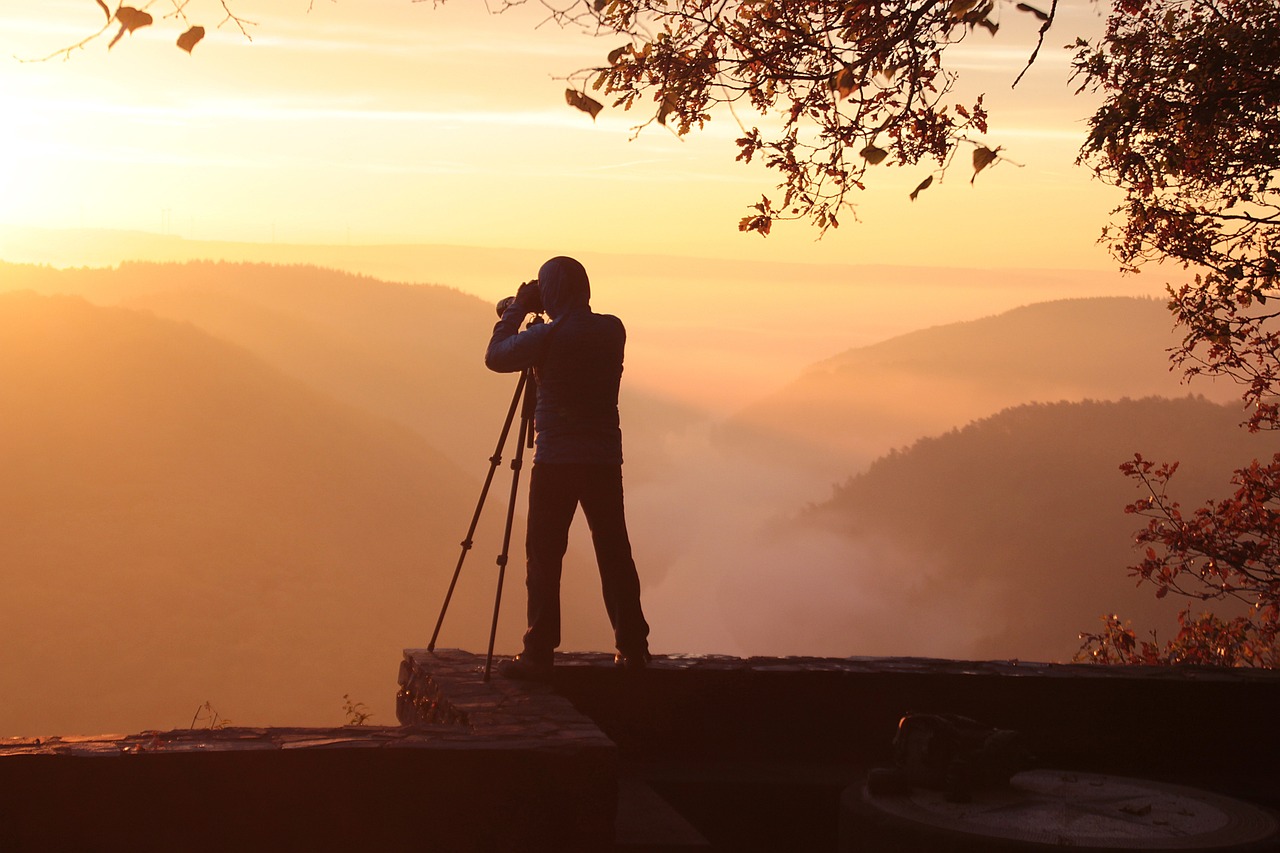
Tips for taking photos and videos if your budget does not run to a professional photographer
Preparation is everything!
A good camera with the correct lens will produce better photos and videos than the camera on a phone.
- Get the focus right. Use a tripod if possible to avoid camera shake, and use the timer feature if your camera has one.
- Get the lighting right. Generally, photos taken outside come out best an hour after sunrise or an hour before sunset. Bright sunlight shining through a window in a dark room will not produce desirable effects.
- When taking videos of static objects, such as a line of products, do not sweep across them too quickly or too slowly with your camera. Try and find the correct balance.
- Prepare the foreground. Make sure the main subject is central. With products, check for damage and damaged packaging, etc.
- Prepare the background. Avoid clutter.
- Check for and remove if necessary any unwanted items in all areas, such as litter, etc.
- Make sure your shadow doesn't show.
- Make sure your reflection or camera flash doesn't show in windows, mirrors, or any other reflective surface.
- ALWAYS check your work before leaving the photo or video set, as this can save time and money in the future. Look for people with their eyes closed, unwanted facial expressions, people blocking the faces of other people, etc., and take another photo if necessary.
Posted by Mary
Post No. 5 - 11/11/2024

